Friday 6 September 2013

Mini raw blackberry pies

It's high season in blackberry world! Time to create some treats with these delicious little bubbles. For variation's sake I tried a raw and vegan recipe. Raw food is not only healthier, but it is also easier and quicker to make, and most recipes are highly original and creative. This is what I made:


Mix and mince the following ingredients in a blender:
2 hands of almonds
the same amount of dates
a little salt

Put a little grated coconut in a baking/muffin tin to make sure the pies will come out easier. Then put the dough/crust in the tin to form a little cup. Next, put it in the freezer.

Again, mix and mince the following ingredients in the blender:
4 hands full of fresh blackberries
1 spoon coconut butter
1 spoon liquid sweetener (for example agave nectar)

Divide the blackberry filling over the crusts and put it again in the freezer (or eat immediately). For small ones, you can take them out the fridge 15 minutes before serving. Don't forget to add a fresh blackberry or mint leaf on top!

Monday 22 July 2013

Happy berries


Summer is a happy season; a period filled with colours, warmth, fresh air and flowery smells and of course it's the harvest season! And together with the harvest, it is also a growing and reproduction time for plants. By now the strawberries have all been eaten by us, and the raspberries are the next ones to consume. De-li-cious! And in one month, the blackberries are most likely ripe to make our berry summer complete.

Did you know that these three types of berries are very easy to multiply? You don't have to do anything for it, they make new plants themselves every year. Just sit and wait, and next year you have the double amount of plants and the year after that a huge harvest of berries! With the following description you can help your strawberry and raspberry mothers to reproduce:
Strawberries make sprigs with one or two baby plants. You can lead them to a place where they can grow without getting in the way, put them a little deeper in the ground to root, and when they have developed proficient roots, you can cut the babies from the mother plant. You can also replace/replant them by then.
Blackberries and raspberries also make baby plants, but underneath the ground. If a raspberry shoot is growing somewhere where it is not desired, you can cut it off and plant it somewhere else. Make sure you cut the shoot off deep enough; dig a little hole around the shoot and make sure you include some baby roots with the plant when you cut it off from the mother plant. We wish you a happy summer with loads of berries and baby plants!

Monday 15 July 2013

Mad tea party

Last weekend we put our tea and herbs-blogs into practice: we went to Madnes festival with the Lucky People Center and shared fresh tea with the festival people. We brought herbs from our garden, picked flowers around the festival and filled the table with vintage teapots and -cups. The visitors could choose between two teas: an anti-hangover tea (appropriate for this festival) with lemon balm to calm the head and body, ginger against nausea and mint against bad drinking breath and stomach problems. The other tea consisted of cinnamon, cloves and fennel, for a happy tummy and good digestive. It was great to share our knowledge, meet interested people and to make everyone feel relaxed and happy. Sure to be continued!


Wednesday 19 June 2013

Perfect lettuce


As if we bought it at the supermarket and put it in the soil. As if we overloaded it with pesticides and sealed our garden hermetically against all living influences. As if we used highly unnatural seeds and stuffed the seedlings with extra artificial growing- and chemical color-supplements. This is the result of simply covering your lettuce with a thin plastic sheet with little holes, and add some water now and then. Beautiful food can be so simple!

Saturday 15 June 2013

Simple classic pasta dish

I present you the recipe for the most simple, perfect, classic pasta dish. Great food for if you forgot the time while doing all sorts of things in the garden - and suddenly felt very hungry.


From the garden:
- spinach
- salad rocket (if you like it a little bitter),
- and/or chard
- optional: chive flowers

From the cupboard:
- pasta
- sundried tomatoes
- optional: cheese leftovers/feta/pecorino
- olive oil
- lemon juice
- pepper, salt

Cook the pasta. Wash the greens in the meantime, and cut or tear the leaves, together with the tomatoes and cheese. Drain the pasta. Add the ingredients to the hot pasta and add some olive oil, lemon juice, salt and pepper by taste. Decorate the dish with chive flowers.
Easy peasy and tasty as a green, sunny garden.

Wednesday 12 June 2013

Fresh spring detox tea

Spring is finally in full bloom. The fresh light green to yellow leaves are everywhere, including the colors of blossoms and spring flowers. Did you know that many plants can be eaten - and are the tastiest - when you pick the juicy young shoots? Think of green beans, fenugreek, hop or the most famous spring vegetable: asparagus. Nowadays one can buy sprouts, or the seeds of tiny cresses, as a form of health food. It is priced with extra antioxidants and more nutrients than its adult form. Also lettuce variations or beans are softer, crispier and juicier when picked in early spring. When the vegetables grow older, they will become tougher, leathery and often with  hard-to-get-through strings. 


Here is a simple fresh recipe for a spring detox tea. Remember to take advantage of the currently growing fresh springy tops!


Pick one of the following garden herbs:

- St. John's wort (mainly the flowery tops, but watch out if you're on medication)
- Dandelion (leaves or root)
- Nettle (see our post on nettles)
- Golden rod (mainly the flowery tops)

And add for a nice taste (detox herbs can be bitter):
- Lemon balm
- Mint
- Fresh spring fruits

Tear the leaves in little pieces and pour boiled water over it. Leave the mixture for some minutes and drink it warm, or let the drink cool for ice-tea. If you prefer the latter, don't forget to add some lemon juice!

Monday 27 May 2013

Spring in the making

If spring doesn't come to us, we create our own spring; here's a collection of spring pictures made in between cloudy, cold and rainy periods in our not-yet-so-springy allotment:

Apples in the making

Blooming forget-me-not

Growing women's mantle

Broad beans in the making

Poppy's in the making

Blooming Columbines

Strawberries in the making

Gooseberries in the making


Thursday 11 April 2013

Albino rhubarb

We started a small experiment in our garden. We own three rhubarb plants, which showed their first red signs already in February. From that moment on, we hid one plant under a large old pot, so the plant is completely isolated and blocked for light. The pot created a dark and warm little micro climate for the rhubarb. We read about this method in an old vegetable garden book; it forces the growing process and it also makes the rhubarb whiter and therefore less sour (like we do with chicory to make it less bitter).

I couldn't wait to take a little peek underneath the pot. Now let us present to you the result after two months:

The 'normal' one

The covered one

These pictures are made at the same time, and reveal a clear contrast between the hidden, lighter and larger rhubarb, and the other plant that was exposed to sun and cold weather. What a difference! And what great colours! This experiment directly shows the impact of warmth on the growing speed of plants, and the influence of sunbeams on their colours (or chlorophyll level). Pretty awesome.
Stay tuned for the next experiment in which we will test the difference in texture and taste of our two rhubarb plants.

Tuesday 2 April 2013

Natural delay

4th month minus 2 degrees equals 1,5 month delay. Spring is late this year.
The allotment gardens are quiet, plants are developing slowly, only a few spring flowers are peaking above the ground; even the weeds bowed out. We are not really sure what to do with our sowing plan, since everything is one and a half month behind. At the moment we're acting like it is the beginning of March.

February had a few warm days which made our hands itch for some earth and greens. So we soaked our first vegetable seeds in some water for a day to enhance the germination process. The peas we have can be planted in mid-February, and also green beans are known for their early growth and resistance against some frost.


However, warm weather and itchy green fingers in February can be very tricky, since temperatures below zero are still highly possible in this month, which can kill fresh young plants easily. And indeed, the beautiful days were followed by very cold weeks that persisted until now. Gladly we kept our peas and beans safely inside to strengthen.


In the past weeks the peas had grown so high, they had to go outside. And finally, at the beginning of April came the first reasonable days again. Time to plant!

Next to this we sowed red scallion, cavalo nero, spinach, lettuce, radishes, which are normally ones that can be sowed already in March. We are curious what this natural delay will cause for this growing year.

Monday 25 March 2013

Compose your own tea

We adore tea. Period.
We love its versatility and multi-faceted taste; its appropriateness for every moment; its calming, comfortable, warming and healing effects; and its purity and ease to make it. The latter argument does not only concern the simple boiling of water and adding a teabag. No, it is also quite easy to personally mix and compose the tea that fits you and your needs.

There are (at least) three starting points of mixing your own tea: the first is based on taste, the second on health, and the third is a combination of these two qualities. Before you create your mixture, think of the effect you would like to bring forward with the tea: just something to still the thirst; a nice, good-tasting drink; a healing tincture for physical complaints (specific pains in the body, increase energy, warmth); and/or a drink which will effect the mental state (comforting, alerting, making happy). Other possibilities can be its compatibility with a certain dish/meal, or a specific moment, season or event, or will it be a gift?

The second step is to find the right ingredients that will fit the answers of the previous questions. Compiling according to your own taste is easy: what kind of flavours do you like? Fruity, spicy, exotic, sweet or even savoury (it's your tea!)? Finding the ingredients that will soothe your physical or mental complaints requires some help from Google or books about curative herbs (or find some on our blog). You can buy the herbs in most reform-shops, -apothecaries, or even better: pick or grow (and dry) them yourself.

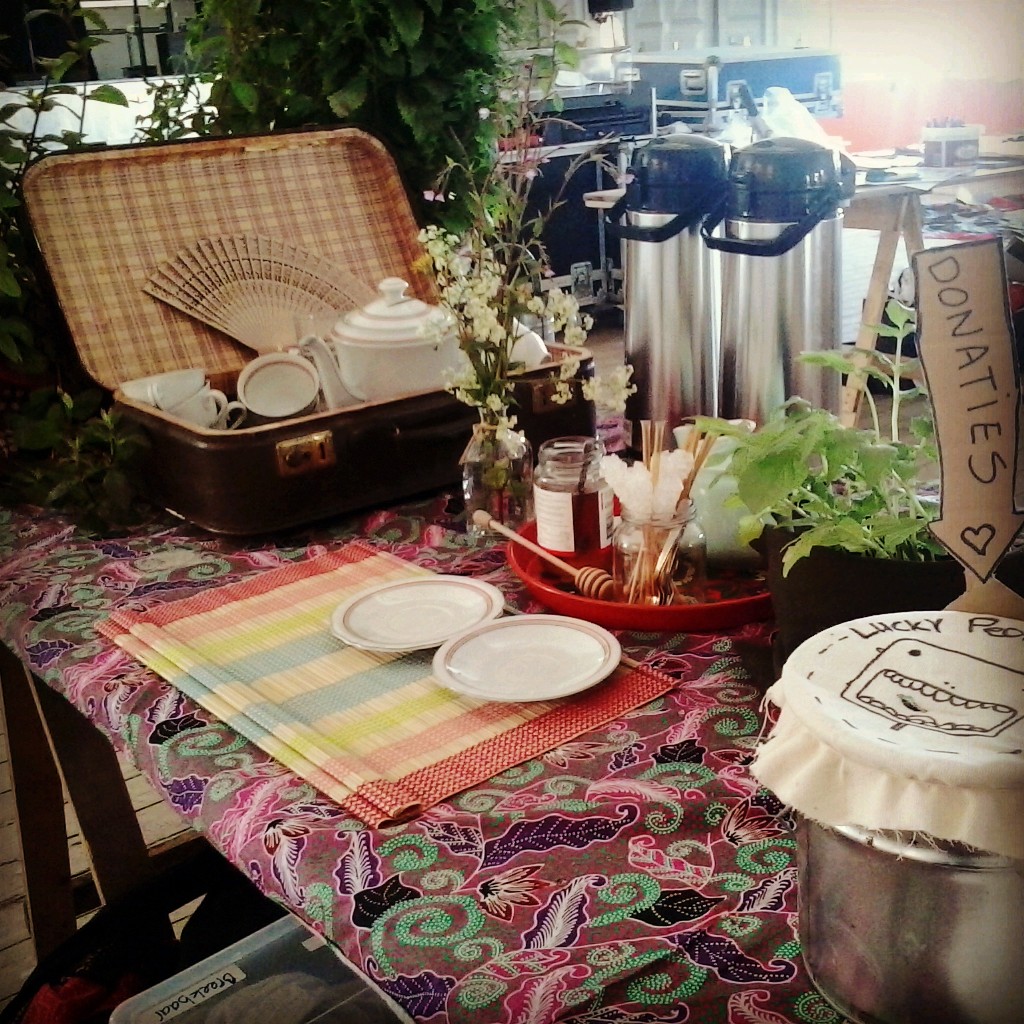
Then it is time to experiment, smell, taste, sample and assemble. For this you will need the selected herbs and other ingredients, boiled water, tea mugs, sachets or tea infusers, spoons, bowls for mixing, an empty jar/pot for your creation and something to label it, pen and paper for notes, and perhaps some plain cookies and other people for more/better taste buds.


Write down the steps you take for your perfect mixture; how many spoonfuls of each ingredient? Then start adding and mixing ingredients in a bowl. Which ingredient do you like the most? Which taste would you like to stand out? Perhaps there are some herbs which are good for your health but taste bad or bitter; make sure to balance or exceed this taste with better tasting herb(s). Test which flavours go together, but also try unexpected combinations. 
You can test your combinations by drinking the result, but simply smelling two separate ingredients together can also be helpful. In addition, don't forget other flavourings such as dried fruits (apple, lemon, raisins, cranberries), check your cupboard for regular kitchen herbs (pepper, thyme), and what about chocolate or nuts?
After you're done mixing and you still think there is something missing (for example when your mixture tastes watery), try to add some black tea, green tea or rooibos to finish your tea. 
Name and label your tea, and enjoy drinking it!


When the sun comes out, a post about ice-tea will follow!

Wednesday 20 February 2013

Pollard willows

Thinking of Holland, I see a landscape of pastures and small paths between two ditches of water with on both sides rows of pollard willows. These willows are not only planted to hold the path firmly between the water, but for centuries, these trees provided farmers with sticks and wood for the garden, brooms, the fireplace, fencing, and other domestic functions.

January and February are traditionally the best months to top the willows; it is the month in which farmers and gardeners do not have much tasks to finish. It's an easy cut; just remove all branches closely to the trunk. Then strip the branches you would like to keep (the straight and thick ones) from its side-branches.

It is a good idea to have one or more pollard willows in or close to your garden. Every one or two years it provides you with nice firm and flexible sticks for your garden, such as for bean stakes or partitioning. The thinner and more bendable twigs can be used in making a small wired twig fence (google 'making a willow fence' for some pretty ideas). Also think of great little green huts or arches! Every willow twig that is put in the ground, no matter how small or terrible you cut it, will grow and produces green leaves, and eventually more twigs to continue this process.

Wednesday 13 February 2013

For all you garlic lovers

Garlic. I know many people who are absolutely crazy about this one. But did you know that it's so easy to multiply just one clove into a full fresh garlic bulb yourself? Indeed, that little green center that you see when cutting a clove is the beginning of this. It already grows without water and soil, so a garden or big pot does not even seem necessary. How convenient, that now (February and March) is a perfect time to plant garlic!


Grow your own garlic:
1. Every clove becomes a bulb, so take as many cloves as you plan to harvest full bulbs. You can just use garlic from your greengrocer, dried or even ones you kept too long in your cupboard.
2. If you have a garden, or a little piece of soil situated in a sunny place, just prepare the ground by digging it a little. No extra fertilizer is needed.
3a. Make a little hole of about 2,5 cm deep and put a clove with the narrowest tip upwards in the cold earth. Put the next ones 15 cm further away. Be careful not to push the cloves with too much pressure in the ground. Once planted, do not replant the garlic.
3b. Growing garlic in a pot on a balcony is also a good possibility. It requires the same preparations as described in the previous steps. The only negative point of growing crops in pots is the bad draining, so make sure the rainwater can get away, and don't let the plants dry out.
4. At the end of the summer (just let nature do all the work and watering), the green stem leafs will turn yellow, dry and begin to droop. When this phase is complete, you can carefully dig up the bulbs and leave them to dry in the sun. If it rains, dry the garlic under a shelter.
5. Hang the garlic in a dry and cool place for storage. Garlic will stay good for a long time in this way. Don't forget to save some cloves for next year!


Edit 22-2-2013: as Anonymous pointed out below, October and November are also perfectly good to plant garlic.

Sunday 10 February 2013

Oh sweet vegetables

In Western cuisines exist quite some rooted restrictions, and fixed combinations of ingredients. However, taboos are being broken and cooking now becomes more and more an act of experimenting. Take for example the division between vegetables and fruit, which is often associated with the opposition of savoury and sweet; sugar or sweeteners are very incidentally added in lunches or diners, and vegetables are not often used in desserts or sweet bakeries. Carrot is one accepted exception, which is used as a sweetener since centuries. 
Owning a vegetable garden triggers you to find new ways of processing bulks of the same crop. If you think you used up all your vegetable inspiration, it is time to expand your sweet baking skills with vegetables! Think of carrot cookies, pumpkin cheesecake, parsnip cupcakes, beet-chocolate pie (my favorite, see picture below) or zucchini cake.


Beet-chocolate pie

In this way, you do not only present something original and eccentric to your guests, but it also makes these calorie bombs a little healthier and less heavy on the stomach. The vegetables make the cake smoother and fresher in taste and structure, while replacing massive cake contents.
Below, I will present the recipe for zucchini cake. In this one the zucchini does not define the taste, but makes the cake very soft and spongy (like pandan cake).

Ingredients:
3 eggs
130 gr caster sugar
200 gr flour (+ some extra)
2 teaspoons baking powder
a little salt
150 ml sunflower oil
1 grated and drained zucchini (250 grams)
1 teaspoon lime zest
1 teaspoon grated ginger

Preparation:
Beat the eggs and sugar for some minutes until it becomes thick, light and creamy. Sieve the flour, baking powder and salt and stir it together with the oil lightly through the eggs. Then add the zucchini, zest and ginger. If the batter is way to fluid, add a little flour. Prepare a round baking tin (24 cm) and bake the cake 50 to 60 minutes in a 180°C preheated oven. Optional: top the cake with cream cheese mixed with lime juice, and caramelised or candied zucchini slices.

Friday 1 February 2013

Seeded gifts

Seeds and plants are always appropriate as presents when you do not really know what to give, or on the other hand, when you want to gift someone with something special and useful. Many plants have a specific meaning and are therefore ideally suitable for special occasions (think of forget-me-not, sunflower, four-leaf-clover).
Next to selected packages of different veggie seeds to create little vegetable gardens, another variation is a mix of seeds to grow herbs for tea. This is one of my favorite, since these include more unique plants which aren't often found in gardens and shops. Chamomile, mint, st. John's wort and marigold seeds would make a fun and healthy assembly!

Here are two other original seeded gifts I stumbled upon: tiny postcard gardens in the shape of a garden or botanical garden.


The second one is also a great invention: recycled paper filled with seeds. After use, you can put it in the earth, and with some water and patience the seeds will grow into anything that flowers! You can buy it on the internet, or make plantable paper yourself!